Sebagai pengguna komputer, tentu semua ingin kinerja komputer kita bagus, respon cepat, akses data lancar tanpa harus menunggu lama dan sebagainya. Oleh karena itu ada baiknya kita mengetahui apa saja yang menyebabkan atau berpengaruh dengan lambatnya komputer kita. Berikut ulasan ringkas 9 hal yang paling sering menyebabkan kinerja komputer menjadi lambat plus tips atau solusinya.
1. Malware (virus, worm, trojan, dsb )
Ketika komputer kita terkena malware ( virus, worm, trojan, dan sejenisnya), sudah hampir dapat dipastikan bahwa kinerja okmputer akan lambat. Virus akan sering menggunakan sumber daya komputer baik RAM atau CPU, termasuk juga senantiasa memantau aktivitas komputer. Hal ini tentu sangat berpengaruh terhadap kinerja aplikasi lain.
Solusi untuk mencegah ini bagi pengguna Windows adalah menginstall Antivirus dan tidak hanya berhenti disitu saja, tetapi rutin update antivirus tersebut. Jadwalkan paling tidak seminggu sekali jika komputer tidak online.
2. Spyware, Adware dan sejenisnya
Jika kita sering menggunakan komputer untuk ber-internet, jika tidak berhati-hati ada kemungkinan komputer bisa terkena spyware. Efeknya mungkin tidak begitu besar dengan kinerja komputer, tetapi bisa berpengaruh pada akses internet, dan berbagai hal yang menganggu kenyamanan berinternet dan yang lebih buruk, data-data penting (user, password, account dll) kita bisa di ketahui oleh si pembuat spyware ini.
Solusi bisa menginstall Anti-spyware yang juga senantiasa update, hanya perlu dipilah-pilah mana yang tidak banyak menggunakan sumber saya (resources) komputer kita, karena tidak jarang Antispyware ini menggunakan CPU dan Memory yang cukup besar. Jika antivirus sudah menyertakan, kita tidak perlu menambah. Atau gunakan versi portable, dan scan dari spyware secara berkala saja.
3. Banyaknya Aplikasi berjalan di belakang
Semakin banyak komputer kita dengan software, biasanya akan semakin memperlambat kinerja komputer, meskipun pengaruhnya ada yang relatif kecil dan ada yang besar. Penting untuk diketahui ketika menginstall software, cek apakah ada aplikasi yang senantiasa berjalan di belakang. Hal ini bisa di ketahui dengan program seperti Autoruns.
Solusi dalam hal ini adalah menggunakan sofware yang penting saja, pilih satu software jika ada beberapa software sejenis atau mempunyai fitur hampir sama dan jika ada versi Portable-nya maka bisa menjadi alternatif. Untuk mengurangi program yang berjalan di background, gunakan Autoruns, dan non aktifkan aplikasi background yang tidak penting. Untuk mengatahui apakah aplikasi yang di install akan menjalankan program di belakang, install software seperti WinPatrol.
4. Hard disk (HDD) yang sudah berumur
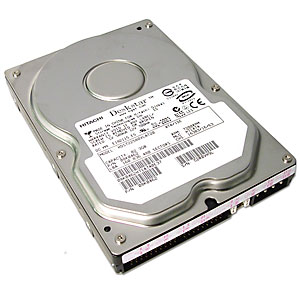
Ketika komputer kita masih menggunakan Hardisk yang sudah cukup lama (tua), mungkin lebih dari 5 tahun, maka kinerja komputer bisa semakin lambat. Untuk mengecek, kita bisa menggunakan software gratis HDD Tune dan sejenisnya (baca artikel: Periksa Kondisi Hard Disk Komputer Anda). HDD SATA normal biasanya rata-rata akses read (baca) sekitar 70 – 90 MB/s. Jika misal rata-rata akses HDD dibawah 50 MB/s maka kinerja biasanya akan terasa lambat.
Solusi ketika hardisk sudah sangat lambat, mungkin bisa dicoba dengan full format (awas, backup data terlebih dahulu). Meskipun untuk hardisk tua hal ini biasanya tidak akan banyak membantu, sehingga yang paling baik adalah dengan mengganti hardisk baru, dan jika masih ingin menggunakan hardisk lama, gunakan sebagai secondary hardisk saja.
5. RAM/Memori yang pas-pasan
Banyak sedikitnya jumlah RAM/Memori yang kita gunakan memang tidak bisa dibuat standard sama untuk satu komputer dengan komputer lain atau bahkan sistem operasi. Meskipun ketika akan menginstall Windows, ada spesifikasi minimal RAM, tetapi jenis aplikasi yang kita gunakan juga harus diperhitungkan. Untuk mengecek, buka saja Task Manager dan di bagian Performance periksa PF Usage dan juga Physical Memory yang menunjukkan total Memory fisik (RAM) dan sisa tersedia (Available).
Jika kita tidak sedang menjalankan aplikasi apapun, tetapi sisa RAM tidak lebih dari setengahnya, biasanya kinerja komputer akan lambat, maka harus diperiksa aplikasi apa saja yang menggunakan banyak memory (RAM), secara umum bisa dicek di tab Process, kolom Mem Usage. Jika memang RAM kita pas-pasan (misal windows XP dengan RAM 512 MB atau kurang, windows 7 dengan 1 GB RAM), maka solusinya termurah adalah mengurangi aplikasi yang banyak memakan memory. Solusi terbaik adalah Upgrade memory (RAM)
6. Konflik aplikasi atau program yang di install
Tidak jarang dua aplikasi dalam kategori yang sama bisa berakibat terjadinya konflik, yang semakin memperlambat kinerja komputer. Tanda-tanda terjadi konflik adakan komputer yang bermasalah setelah kita menginstall suatu software, padahal sebelumnya tidak ada masalah. Yang sering terjadi konflik biasanya di kategori software security, semisal antivirus.
Misalnya kita menggunakan 2 antivirus atau lebih. Meskipun beberapa antivirus bisa berjalan bersamaan, tetapi tetap tidak direkomendasikan, kecuali untuk pengguna ahli atau untuk ujicoba. Belum lagi ketika masih harus menginstall software security lainnya.
Jika ada alternatif berbagai software sejenis, maka jika memungkinkan pilih satu saja yang bisa mewakili, dan unggul dalam kinerja dan hasil. Terutama untuk jenis software yang banyak mengakses sumber daya atau sistem operasi.
7. Pemilihan Software yang kurang tepat
Tidak sedikit orang hanya ikut-ikutan (trend) dalam penggunaan software, padahal fitur yang diinginkan sebenarnya terdapat dalam software lain yang kecil dan gratis. Jika spesifikasi komputer kita memang minimal atau kita ingin bekerja dengan cepat, maka pilihlah software yang tepat. Software dengan ukuran besar tidak senantiasa lebih baik dan tepat bagi masing-masing kita. Berikut beberapa contohnya :
Ketika kita hanya ingin burning data ke CD/DVD, solusi tepat bisa menggunakan software ImgBurn yang hanya berukuran sekitar 5 MB atau software burning gratis lainnya yang relatif kecil daripada menginstall Nero Multimedia Suite yang berukuran sekitar 354 MB.
Ketika kita bekerja dengan data terkompresi ( zip, rar ), software gratis seperti 7zip yang hanya berukuran sekitar 1 MB seharusnya sudah mencukupi, daripada menginstall Winzip 15 yang berukuran hampir 13 MB dan juga tidak gratis (software kompresi gratis lainnya)
Jika menggunakan Photoshop 7 atau CS1/2 sudah mencukupi untuk kebutuhan grafis, maka menginstall Photoshop CS5 perlu difikir ulang, karena spesifikasi yang dibutuhkan cukup tinggi, sehingga kerja bisa semakin lambat.
8. Banyaknya Software yang terinstall
Meskipun software-software yang di install tidak berjalan di belakang, tetapi hampir setiap software selalu menambahkan entry (data) ke registry, sehingga semakin banyak software yang di install ukuran registry (windows) juga akan semakin besar. Karena registry ini akan di akses baik ketika komputer berjalan maupun sudah berjalan, besar kecilnya juga mempengaruhi ke kecepatan/ waktu respon-nya.
Solusinya adalah menggunakan software yang memang diperlukan saja, Uninstall software yang tidak penting dan gunakan Uninstaller seperti Revo Uninstaller agar proses uninstallasi lebih tuntas. Untuk membersihkan software yang sudah di uninstall, bisa juga menggunakan berbagai Utilities gratis.
9. Penggunaan Efek Windows yang berlebih
Windows Xp, Vista maupun windows 7 menyediakan opsi untuk menggunakan tampilan dengan berbagai efek. Jika komputer kita mempunyai spesifikasi yang bagus, tentu berbagai efek ini tidak menjadi masalah, tetapi jika ingin performa cepat, berbagai efek windows bisa di non aktifkan.
Misalnya Untuk windows XP, klik kanan My Computer, pilih tab Advanced dan klik setting bagian Performance. Kita juga melalukan tweak sistem untuk mendapatkan setting yang tepat dan cepat, dengan menggunakan software semisal X-Setup Pro.
Sebenarnya selain 9 hal diatas masih banyak sebab lain, seperti berbagai service windows yang berjalan yang sebenarnya tidak diperlukan, pemilihan dan pengaturan hardware yang tidak optimal, space primary disk (misalnya drive C:) yang diambang batas atau hampir habis, dan lainnya.
.png)